
Starry Sky in HTML5 Canvas - Part 1

In my spare time I often enjoy creating visualizations using HTML5 canvas. I'm planning to do a little presentation about this so I thought a good way to get started was to create a blog post explaining how to do a simple one.

This tutorial will teach you how to create something like the image below from scratch!

Animated Starry Sky with Moon

IMPORTANT -- you can try out the result of this part of the tutorial by visiting this CodeSandbox. However, I encourage you to read the blog post and try to follow along to understand how and why it works.

First, you will need an HTML file, let's name it index.html:

<!DOCTYPE html>
<html>
  <head>
    <title>Starry sky</title>
    <style>
      body, html {
        padding: 0;
        margin: 0;
      }
      canvas {
        position: absolute;
      }
    </style>
  </head>
  <body>
    <canvas id="canvas"></canvas>
  </body>
</html>

Nothing crazy so far, just some styles and a canvas element.

Next, let's create a JavaScript file. Let's name this index.js.

const backgroundColor = "#030318";
const width = window.innerWidth;
const height = window.innerHeight;
const canvas = document.querySelector("#canvas");
const ctx = canvas.getContext("2d");
canvas.width = width;
canvas.height = height;

function render() {
  ctx.fillStyle = backgroundColor;
  ctx.fillRect(0, 0, width, height);
}
render();

In the code above, we set the canvas' width and height so it takes up the whole window. Then, in the render() function, we fill the canvas with the background color. If you run it on your browser, it will look like this:

Step 1

Yup. Not very interesting. Let's put something in there! Let's add some code to our index.js file to draw some stars.

First, let's have a function that creates the stars.

function createStars(width, height, spacing) {
  const stars = [];

  for (let x = 0; x < width; x += spacing) {
    for (let y = 0; y < height; y += spacing) {
      const star = {
        x: x,
        y: y
      };
      stars.push(star);
    }
  }
  return stars;
}

const stars = createStars(width, height, 30);

The spacing parameter will control the spacing between stars.

Then, let's update our render() function so it renders the stars.

function render() {
  ctx.fillStyle = backgroundColor;
  ctx.fillRect(0, 0, width, height);
  stars.forEach(function(star) {
    const x = star.x;
    const y = star.y;
    const r = 5;
    ctx.beginPath();
    ctx.fillStyle = "rgb(255, 255, 255)";
    ctx.arc(x, y, r, 0, Math.PI * 2);
    ctx.fill();
  });
}

For our purposes, a star is a circle, so we can use the arc() function to draw our stars. An explanation of the parameters:

  • x and y are used for the position.
  • r is used for the radius of the circle.
  • 0 and Math.PI * 2 are the start and end angle, respectively. A full circle goes from 0 to 2pi.

The line ctx.fillStyle = "rgb(255, 255, 255)"; is used to set the color of the circle to white.

Let's see what we get now:

Step 2

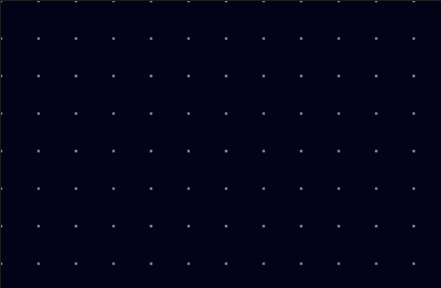
It's definitely a bit more interesting. But it doesn't look like a starry sky at all! Stars don't usually look so uniform and boring. We need to add some randomness.

Let's create a function called randomInt(max) that will return a random number:

function randomInt(max) {
  return Math.floor(Math.random() * max);
}

Then, let's use these random numbers when creating our stars:

function createStars(width, height, spacing) {
  const stars = [];

  for (let x = 0; x < width; x += spacing) {
    for (let y = 0; y < height; y += spacing) {
      const star = {
        x: x + randomInt(spacing),
        y: y + randomInt(spacing)
      };
      stars.push(star);
    }
  }
  return stars;
}

Step 3

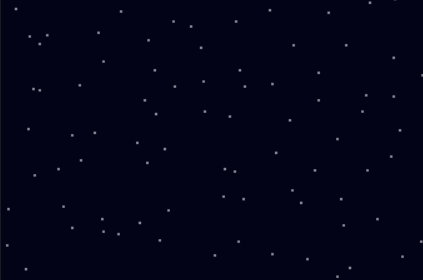
That looks already almost real! Now let's make it so the stars are different sizes. To do this, we will need a different radius for each star, so we will add it to the star objects.

const maxStarRadius = 1.5;

function createStars(width, height, spacing) {
  const stars = [];

  for (let x = 0; x < width; x += spacing) {
    for (let y = 0; y < height; y += spacing) {
      const star = {
        x: x + randomInt(spacing),
        y: y + randomInt(spacing),
        r: Math.random() * maxStarRadius,
      };
      stars.push(star);
    }
  }
  return stars;
}

Then, we will update the render() function so it uses the star's radius when drawing. While we're at it, let's extract the circle drawing logic to a new function as well.

function fillCircle(ctx, x, y, r, fillStyle) {
  ctx.beginPath();
  ctx.fillStyle = fillStyle;
  ctx.arc(x, y, r, 0, Math.PI * 2);
  ctx.fill();
}

function render() {
  ctx.fillStyle = backgroundColor;
  ctx.fillRect(0, 0, width, height);
  stars.forEach(function(star) {
    const x = star.x;
    const y = star.y;
    const r = star.r;
    fillCircle(ctx, x, y, r, "rgb(255, 255, 255)");
  });
}

Step 4

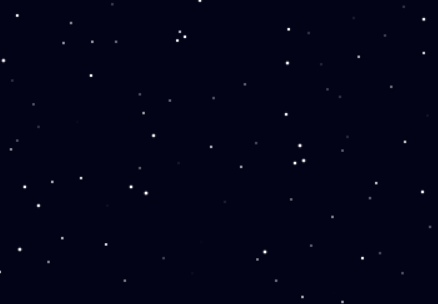
Much better! Now the stars are all different sizes!

This is all for part 1. You can continue reading Part 2, where we will add a moon and make our stars flicker!

How to show preview images when sharing links of your website

You know when you share a link on social media or mesagging apps, sometimes the app shows a nice preview thumbnail with a description? You can click on it and it will take you to the linked website. I wanted to have this functionality for a website I was working on, so I did some research on how to get it working.

Short answer: use the og:image meta tag.

Longer answer: read on.

You have to use Open Graph meta tags. There's a bunch of meta tags to use, but the ones you need for previews are the following:

    <meta name="twitter:card" content="summary">
    <meta property="og:title" content="Thumbnail example">
    <meta property="og:description" content="Only for Nic Cage fans">
    <meta property="og:image" content="https://www.placecage.com/c/460/300">
    <meta property="og:url" content="https://kaeruct.github.io/">

When a website with the previous tags is shared on social media, you will get a nice preview card with thumbnail, title, and description.

Important points:

  • You NEED to include the twitter:card meta tag for Twitter to display the preview. Otherwise it won't work. If you don't care about Twitter you can remove it.
  • Some apps/websites will not include your preview thumbnail if it's not served via HTTPS. So make sure the image URLs always start with https://!
  • The og:url value should point to the canonical URL of the page, not to the root of your website.

Below you can see some examples:

Twitter

Twitter

Slack

Slack

Telegram

Telegram

WhatsApp

WhatsApp

Discord

Discord

Migrating old-style JavaScript code to ES6

Recently (at work) I had to migrate a medium-sized JavaScript codebase (20KLOC) to ES6.

We wanted to migrate to take advantage of the new features such as arrow functions, destructuring, and classes (there are a bunch more!). Additionally, I was tasked with introducing eslint and prettier to improve the quality of our code a bit more.

Before diving into the migration process, first I'd like to give some context on the state of the application.

We already used npm and webpack to build our frontend, so I thought the migration should be straightforward -- and it was.

I was heavily involved in modifying our build process to use npm instead of ad-hoc shell scripts, and I found this guide to be incredibly helpful.

Back to the migration, the first thing I did was to add babel to webpack using babel-loader. It was easy to add to webpack and took almost no time to set up. This meant that webpack would take our JavaScript files and transpile them from ES6 to "normal" JavaScript that all browsers can run. However, in order to get our mocha tests running, it was necessary to hook babel into our tests as well. I used this guide from istanbul and was able to get them running fairly quickly.

Once I ran the build and the tests and everything looked good, then it was time to really port our code to ES6. First, it was necessary to port some code that was using the module pattern to ES6 module syntax. I did this manually (using search/replace tools) and it took me a few hours.

In some cases we had some ugly dependencies on globals so a bit of refactoring was required. In cases where it wasn't possible, webpack has the ProvidePlugin, which covers most cases. I also found the expose-loader to be useful becase we have some code not under our control that required jQuery to be a browser global.

Once that was done, it was time to get started with the syntax changes. I found an amazing tool for that, Lebab. It is a very realiable tool and I would totally use it again. I ran all the "safe" transformations, verified them, and then ran some of the "unsafe" ones, checking how the code changed each time.

Finally, I ran the build and our mocha tests to make sure they still passed. The tests broke in a few places because of things like variables being shadowed because of the changes from var to let or const.

However, with the help of the no-shadow eslint rule, I was able to find all those cases quickly and get them fixed. ESLint was also very helpful in making sure I was not breaking any code with the refactoring I had to do.

The lines of code initially went down because of the ES6 syntax sugar, but they went back up with the introduction of prettier and its opinionated formatting -- especially regarding line length.

In the end, the migration was not as terrible as I initially thought it would be, and now it's a bit more enjoyable to work on that codebase.

Setting up sendmail to redirect emails

Disclaimer: the instructions below are for Ubuntu, but they should work for most distros, the biggest difference is that the configuration files might be located elsewhere.

If you're like me, you have a main email address and other email addresses set up in other domains.

I dislike having to check all my email addresses individually, so I set up my mail servers to redirect all the email to my main address automatically.

Sendmail has an aliases feature that makes this very simple to set up.

Let's say you want to redirect emails this way:

  • webmaster@yourdomain.com -> example@gmail.com, someoneelse@gmail.com
  • help@yourdomain.com -> helper@gmail.com
  • support@yourdomain.com -> helper@gmail.com

Follow these steps as root:

  1. Change the /etc/mail/aliases file to look like this:

     webmaster: example@gmail.com, someoneelse@gmail.com
     help: helper@gmail.com
     support: help
    

    As you can see, each line in the file matches an origin email to a destination email. Each line can reference previous entries as well.

  2. After changing the file, run:

     $ newaliases
    
  3. Make sure port 25 is open on your machine, so sendmail is able to listen for incoming email:

     $ iptables -A INPUT -p tcp --dport 25 -j ACCEPT
    

    Also make sure to save the iptables rules so they will be restored when the service restarts. This varies by distro, so it's better to google something like iptables save <your distro>.

  4. Change /etc/mail/sendmail.mc so sendmail receives email from the outside world.

    Change this line:

     DAEMON_OPTIONS(`Family=inet,  Name=MTA-v4, Port=smtp, Addr=127.0.0.1')dnl
    

    to

     DAEMON_OPTIONS(`Family=inet,  Name=MTA-v4, Port=smtp')dnl
    

    We're not done modifying this file yet. Now we need to verify that the domain in the configuration matches your server's domain. If not, change it:

     MASQUERADE_AS(`yourdomain.com')dnl
    
  5. After saving the file, you need to regenerate sendmail.cf:

     m4 /etc/mail/sendmail.mc > /etc/mail/sendmail.cf
    
  6. Add your domain to /etc/mail/local-host-names. This file has a domain per line. If your domain is not there, add it on a new line.

  7. Restart sendmail:

     $ /etc/init.d/sendmail restart
    

Depending on the configuration of your email client or web UI, the emails might end up stuck in a spam folder, so make sure to check there.

If you use Gmail, you can make a filter to avoid sending your redirected emails to spam. To do so:

  1. Do a search for from:yourdomain.com.
  2. Click on "Create a filter with this search".
  3. Check the "Never send it to Spam" box.
  4. Click on "Create filter".

Preventing email from being sent to Spam